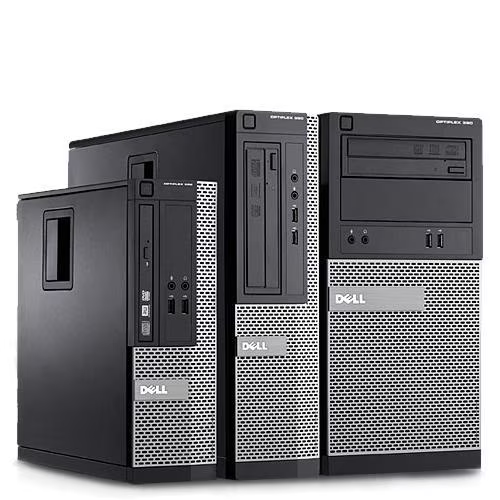
When looking at content on homelabbing, you might get the impression that it is just an expensive hobby. This is completely false. As a broke college student, I started with items that I had lying aroud and so can you.
Old Desktops
I refurbished and upgraded my old (2011) Dell Optiplex 390 by doing a deep cleaning of all the components and the case using an air blower and isopropyl alcohol. It also got some well needed upgrades.
- RAM: 4GB -> 16GB (2x8GB)
- Storage : 250GB HDD -> 1TB HDD + 500GB SSD
- Intel core i3-2100 (2 cores, 4 threads, 3,10 GHz) -> intel core i7-2600 (4 cores, 8 threads, 3,40 GHz)
- NIC: Intel PRO/1000
Old desktops with decent upgradability and good specs are pretty cheap to find these days. Companies often sell them in bulk or donate them when they are renewing their computers. You might also be able to get them for free like I did if your university or employer is getting rid of them.
If you’re a gamer, your old gaming PC might be the perfect for running a hypervisor and spinning up stable VMs.

Cost
The total cost of the upgrades came at around 110€ since I got most of the components used except for the RAM and the SSD. I could have easily paid less if I waited to get good deals but I was really looking forward to start my journey in homelabing.
You can easily get used and refurbished hardware on sites like eBay or Facebook Marketplace to start your homelabbing and self-hosting journey for cheap. The only thing that is required to start is 4GB of RAM, a CPU that supports virtualization and enough storage for an OS.
I also had to do a BIOS upgrade in order for the PC to accept the latest supported hardware like the i7 processor.
Old or Broken Laptops
I’ve been using my broken laptop for 2 years now. The screen hinge popped off, a common issue with Dell’s G3 gaming laptops thanks to that metal-on-plastic design. This kept me from being able to put the lid down.
Like me, many of you might have laptops with busted screen or display or just old laptops collecting dust. These could make great home servers due to their low power output and their size. This video from Hardware Haven’s YouTube channel (my favorite channel for homelab hardware review) shows the feasibility of the endeavor.
Mini PCs
Mini PCs are a staple in the homelabbing community. They don’t take a lot of place, require little power and are easy to work on. Furthermore, used ones are relatively cheap.
Lessons learned
I picked up a few interesting lessons along the way to the journey of getting started with a homelab.
First off, ECC memory is not compatible with non-ECC supported processor which should be obvious but I should have read the description of the article more closely. Ouch!
Also, dismantling and taking a computer apart and rebuilding it afterward is not that complicated and I think that way more people should have this skill. Knowing how to replace your thermal paste, clean dust from components or replace a Power Supply Unit could avoid you some unnecessary trips to the repair shop.
I’m sure there are a lot more for me to learn when it comes to the hardware side of homelabbing. I haven’t even had the chance to check out raspberry pis or enterprise grade servers yet. The journey has just started.
Conclusion
Just grab any old PC or laptop you have lying around. It’s more than enough to start learning about Linux, virtualization and self-hosting.